Crown molding is one of those interior finishing touches that instantly elevates a room from plain to polished. Whether you’re renovating a living room, upgrading kitchen cabinets, or adding architectural detail to a bedroom, learning how to install crown molding correctly can dramatically improve the look and value of your home.
This guide walks you through everything in a practical, professional, and easy-to-follow way, covering essential tools, step-by-step installation, common mistakes, and even how to install crown molding on cabinets. The goal is to help you achieve clean
Quick Install Snapshot:
| Crown molding installation is a structured carpentry task that transforms plain wall-to-ceiling transitions into decorative architectural detailing. The process requires accurate measurement, compound angle cutting, and secure fastening into wall studs. After installation, finishing work such as caulking, filling nail holes, and painting ensures a polished, seamless appearance suitable for both residential and cabinetry applications. |
Core Execution Insights:
| > Precision measurement is more important than speed errors that compound at corners > Inside corners perform best with coping cuts, not simple miter joints > Stud mapping before installation prevents weak or uneven fastening > Dry-fitting each section eliminates costly rework after nailing > Construction adhesive plus nails improves long-term stability > Caulking and surface finishing determine the final “professional” look > Cabinet crown molding requires a mounting strip for alignment consistency > Slight overcuts are safer than undercuts, trim to fit for perfect joints |
Essential Tools For Crown Molding Installation:
Before you cut a single piece of trim, make sure you have the right tools. Using the wrong tools is the number one reason crown molding projects end up looking uneven or gapped.
Here’s what you’ll need:
Measuring and Marking Tools
- Tape measure (25-foot recommended)
- Pencil and painter’s tape
- Stud finder
- Level (48-inch works best for long walls)
Cutting Tools
- A miter saw (also called a compound miter saw) is non-negotiable for accurate angle cuts
- Coping saw for inside corners
- Oscillating multi-tool for fine adjustments
Fastening and Finishing Tools
- Finish nailer (16-gauge or 18-gauge) or hammer and finish nails
- Nail set
- Construction adhesive (optional but helpful on plaster walls)
- Caulk gun and paintable caulk
- Wood filler or spackling compound
Safety Gear
- Safety glasses
- Hearing protection when using power tools
- Sturdy step ladder or scaffolding planks
One tool worth mentioning separately is a digital angle finder. It takes the guesswork out of measuring wall corners that aren’t a perfect 90 degrees, and in most homes, they aren’t. A corner that reads 89 degrees instead of 90 can cause visible gaps if you cut your miter at the standard 45-degree angle.
You’ll also want to pick up a crown molding spring angle guide or simply use a scrap piece to practice your cuts before touching your actual material. Compound angle cuts can be confusing the first time, so practice runs save expensive mistakes.
HOW TO INSTALL CROWN MOLDING IN 6 SIMPLE STEPS
Step 1: Plan Your Layout and Take Accurate Measurements
Start by walking around the room and identifying each wall length. Measure each wall individually; don’t assume opposite walls are the same length. Write everything down.
Decide your starting wall. Most professionals recommend starting with the wall that faces you when you enter the room. This is the “showcase” wall, and it should have the cleanest, most visible joints.
Mark the stud locations along the top of each wall using your stud finder. Crown molding should be nailed into the wall studs and ceiling joists whenever possible, not just into drywall. Mark the ceiling joist locations too. These marks will guide your nailing later.
Step 2: Cut Your First Piece on the Flat Wall (No Corner)
If any wall in your room runs straight without an inside or outside corner (like a wall that ends at a door opening), cut that piece first. It’s the easiest cut and a good confidence builder.
For a flat wall section ending at a door or window casing, you’ll cut a simple 90-degree straight cut. Set your miter saw to zero degrees and cut. Easy.
For pieces that end at corners, you’ll cut either:
- Inside corners (where two walls form a corner that points inward, like most room corners)
- Outside corners (where two walls form a corner that points outward, like on a bump-out or fireplace mantel)
Always cut your molding pieces slightly long, about 1/4 inch, and sneak up on your final fit. It’s much easier to trim a little more than to deal with a gap.
Step 3: Cut Inside Corners Using the Coping Method
Here’s where many beginners go wrong. For inside corners, coping beats mitering every time.
A coped joint means you cut one piece of molding flat against the wall (square cut), and then you cut the second piece to overlap it perfectly. The second piece is shaped with a coping saw to follow the profile of the first piece.
Why cope instead of miter? Because walls aren’t perfectly square. A coped joint stays tight even if the corner is slightly off. A mitered inside corner will open up over time as the house settles.
Here’s how to cope with an inside corner:
- Install the first piece of crown flat against one wall with a square cut at the corner end.
- On the second piece, make a 45-degree inside miter cut; this reveals the profile of the molding.
- Use your coping saw to cut along that revealed profile line, following the curve and detail of the molding face.
- Test the fit. It should press tightly against the face of the first piece.
- Use sandpaper or a rasp to fine-tune the cope until the fit is tight.
This method is what professional carpenters use, and it’s why their work looks so clean.
Step 4: Cut Outside Corners
Outside corners use mitered joints. Both pieces are cut at a 45-degree angle (or whatever your angle finder says) so they meet in a sharp point at the corner tip.
For a standard 90-degree outside corner:
- Set your miter saw to 45 degrees
- Cut the left piece angling to the right
- Cut the right piece angling to the left
- They should fit together at 90 degrees
If your outside corner reads something other than 90 degrees, divide that angle by two to get your miter angle. For example, a 92-degree corner means you cut each piece at 46 degrees.
Glue outside miter joints with a little wood glue before nailing. Outside corners take bumps and knocks, and glue adds strength.
Step 5: Nail the Molding in Place
Now you’re ready to fasten. Position your cut piece of crown molding at the correct spring angle it should rest flat against both the wall and the ceiling.
Nail through the bottom edge into the wall studs and through the top edge into the ceiling joists. Use two nails per stud/joist location: one top, one bottom.
If you’re using a finish nailer, sink the nails so the heads are just below the surface. If hand-nailing, use a nail set to do the same.
On plaster walls or anywhere you’re not hitting solid wood, run a bead of construction adhesive along the back of the molding before pressing it into place. This gives extra holding power and reduces movement over time.
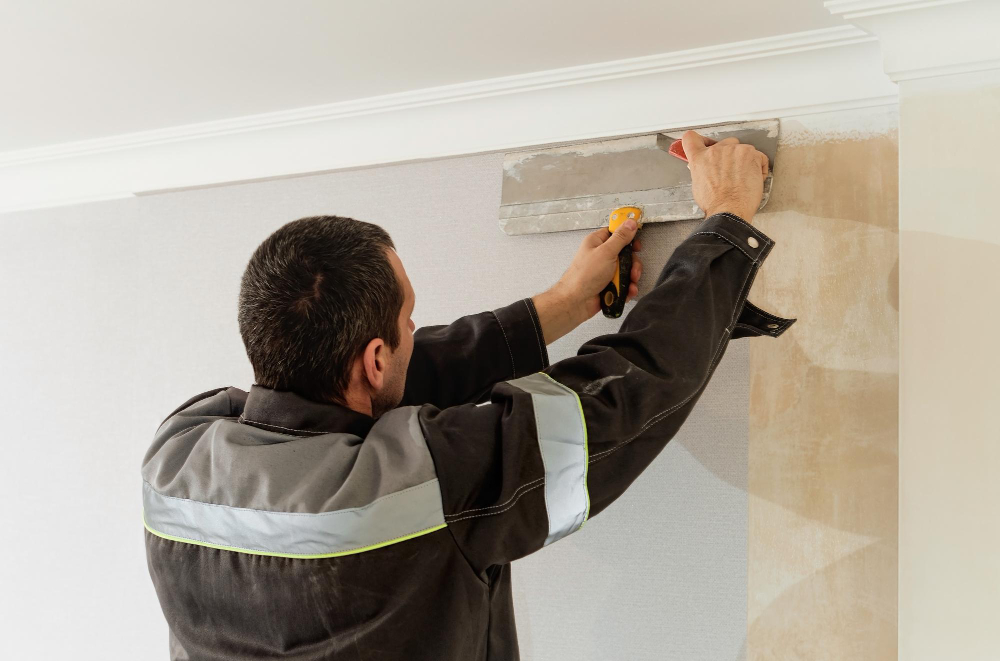
Step 6: Fill, Caulk, and Paint
The finishing details are what separate a good job from a great one.
First, fill all nail holes with wood filler or spackling compound. Let it dry completely, then sand smooth.
Next, run a thin bead of paintable caulk along every joint where the molding meets the ceiling, the wall, and at all corner joints. Smooth the caulk with a damp finger in one continuous stroke. This fills any small gaps and creates that seamless, built-in look.
Finally, prime and paint. Crown molding is typically painted to match either the ceiling or the trim color; white is the most popular choice. Apply two thin coats and let each dry fully before the next.
Common Crown Molding Installation Mistakes (and How to Avoid Them)
Even experienced ones run into problems. Here are the most frequent crown molding mistakes and exactly how to avoid them.
Skipping the Stud Finder
Nailing into drywall only means your crown molding will eventually pull away from the wall. Always locate and nail into studs and joists. Mark them with painter’s tape before you start.
Assuming Corners Are 90 Degrees
Measure every corner with a digital angle finder. Homes settle, walls shift, and corners are rarely perfect squares. Even a 1-degree difference creates a visible gap at a miter joint.
Mitering Inside Corners
As mentioned above, coping inside corners is the professional approach. Mitered inside corners look fine the day you install them, but they gap over time as humidity and temperature change the wood.
Not Letting Paint Dry Between Coats
Rushing the painting process leads to brush marks, drips, and poor coverage. Sand lightly between coats with 220-grit sandpaper for a smooth finish.
Cutting Expensive Molding First
Always test your angles and cuts on scrap wood or cheap lumber before cutting your actual material. Crown molding can be expensive, especially if you choose solid wood profiles.
Ignoring Long-Wall Splices
On walls longer than your molding pieces, you’ll need to splice two pieces together. Don’t make this joint anywhere visible. Splice at a stud location using a 45-degree scarf joint, with two angled ends that overlap for an almost-invisible seam.
How to Add Crown Molding to Cabinets
Cabinet crown molding gives kitchen cabinets a built-in, custom look without a full renovation. The technique is similar to room crown molding but on a smaller, more manageable scale.
Choosing the Right Profile
Select a crown profile that complements the cabinet style. Smaller cabinets look better with narrower profiles (2 to 3 inches). Larger, taller cabinets can carry wider, more ornate molding. Match the wood species or use MDF if you’re painting.
Marking and Measuring Cabinets
Measure the front face of each cabinet run, accounting for inside and outside corners. Draw a level line on the cabinet face where the bottom of the crown will sit. This ensures everything stays level even if your cabinets are slightly uneven.
Cutting and Fitting
Cabinet crown molding uses the same inside-cope, outside-miter approach as wall crown. The main difference is that you’re working at counter height instead of ceiling height, which makes the job much easier.
Use a nailer to attach the crown molding to the cabinet face frame, not the cabinet box. Nail into the solid wood of the face frame for the best hold.
Filler Strips for Gaps
If your cabinets don’t reach the ceiling, you’ll need a filler strip between the top of the cabinets and the bottom of the crown molding. Cut a piece of flat stock to the correct width, attach it to the top of the cabinet, and then install the crown against that strip.
Finishing Touches
Fill nail holes, caulk all joints, and paint to match the cabinets. For a truly seamless look, caulk the joint where the crown meets the ceiling as well. This small detail makes the whole installation look factory-built.
Conclusion
Crown molding installation is a project that delivers long-lasting results. Once you understand the spring angle, master the coped inside corner, and take the time to measure every angle carefully, the process becomes straightforward and genuinely satisfying.
Start with one room, ideally a smaller space like a bedroom or office, to build your confidence before tackling a large open-plan area. Take your time on the cuts, test your fits before nailing, and don’t skip the caulking step at the end.
The difference between a house and a home is often found in details like these. Crown molding is one of the highest-return improvements you can make per dollar and per hour spent, and now you have everything you need to do it right